#
Installation
#
System requirements
- macOS:
- Running 10.13 (macOS High Sierra) or later.
- Windows:
- Running Windows 8 or later in a 64-bit environment.
- Linux:
- Kernel version 4.0 or later. Hapticlabs Studio is available as .deb, .rpm and .snap packages and as AppImage.
#
Checking the system requirements
Hapticlabs Studio runs on Macs with Intel and Apple Silicon (M1) processors.
- Go to the Apple menu in the top-left corner.
- Select About this Mac from the menu.
- The version number is displayed next to the macOS label.
- Open the Start menu.
- Enter Computer in the search field.
- Right-click on Computer and select Properties.
- The version is found under the Windows edition field.
#
Installation instructions
Download the suitable installation file through the provided link.
To install the application, open the DMG and drag the Hapticlabs Studio to the “application” folder.
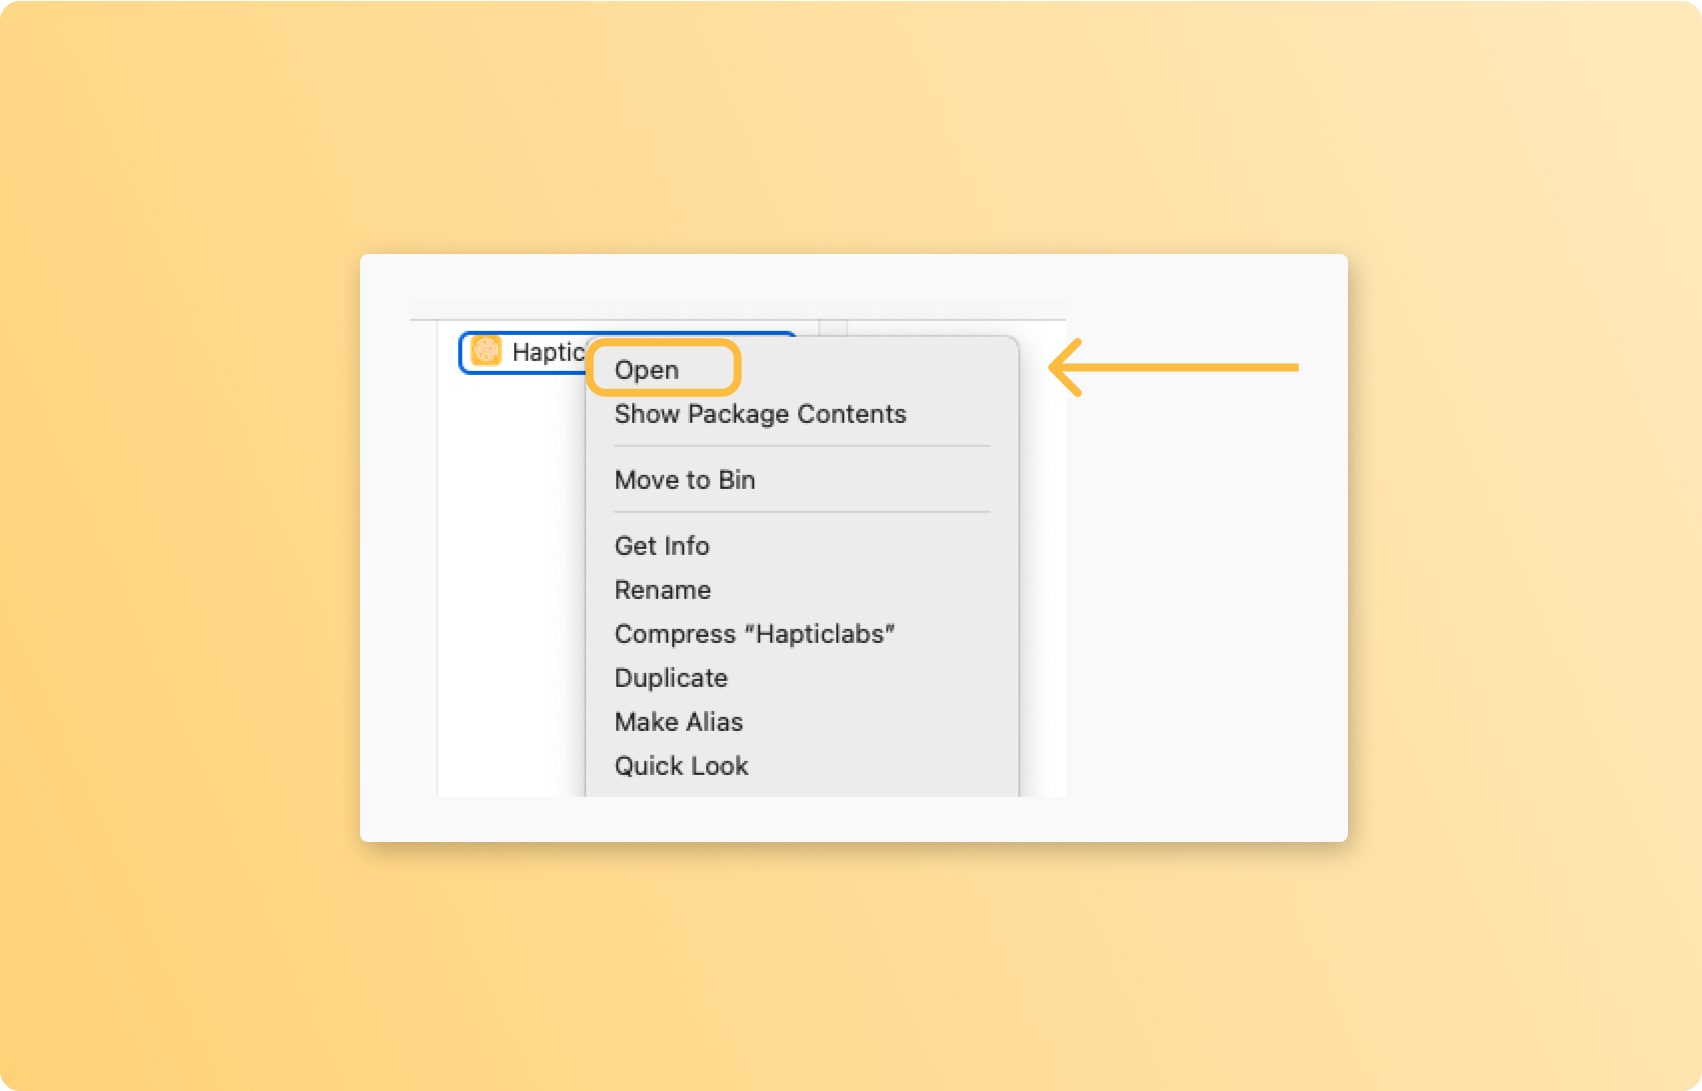
Depending on your setup, you might see the warning "Hapticlabs Studio cannot be opened" when opening the application. To bypass this issue you can do the following:
- Click on “Cancel” within the pop-up warning
- Open the App again by Right-click → open
- To set permanent permission enter System Preferences - Security & Privacy and click "Allow anyway". For more info, follow the instructions here.
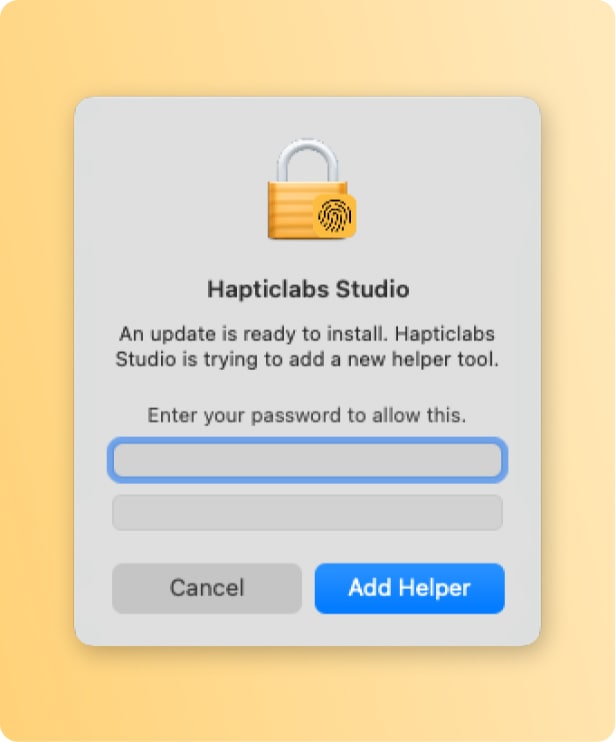
A software update might trigger a "helper tool" prompt. This occurs if Hapticlabs Studio is either not run from the default application folder, or was installed by another user of your computer.
Download the suitable installation file through the provided link. To run the Studio, simply open the Hapticlabs Studio installer.
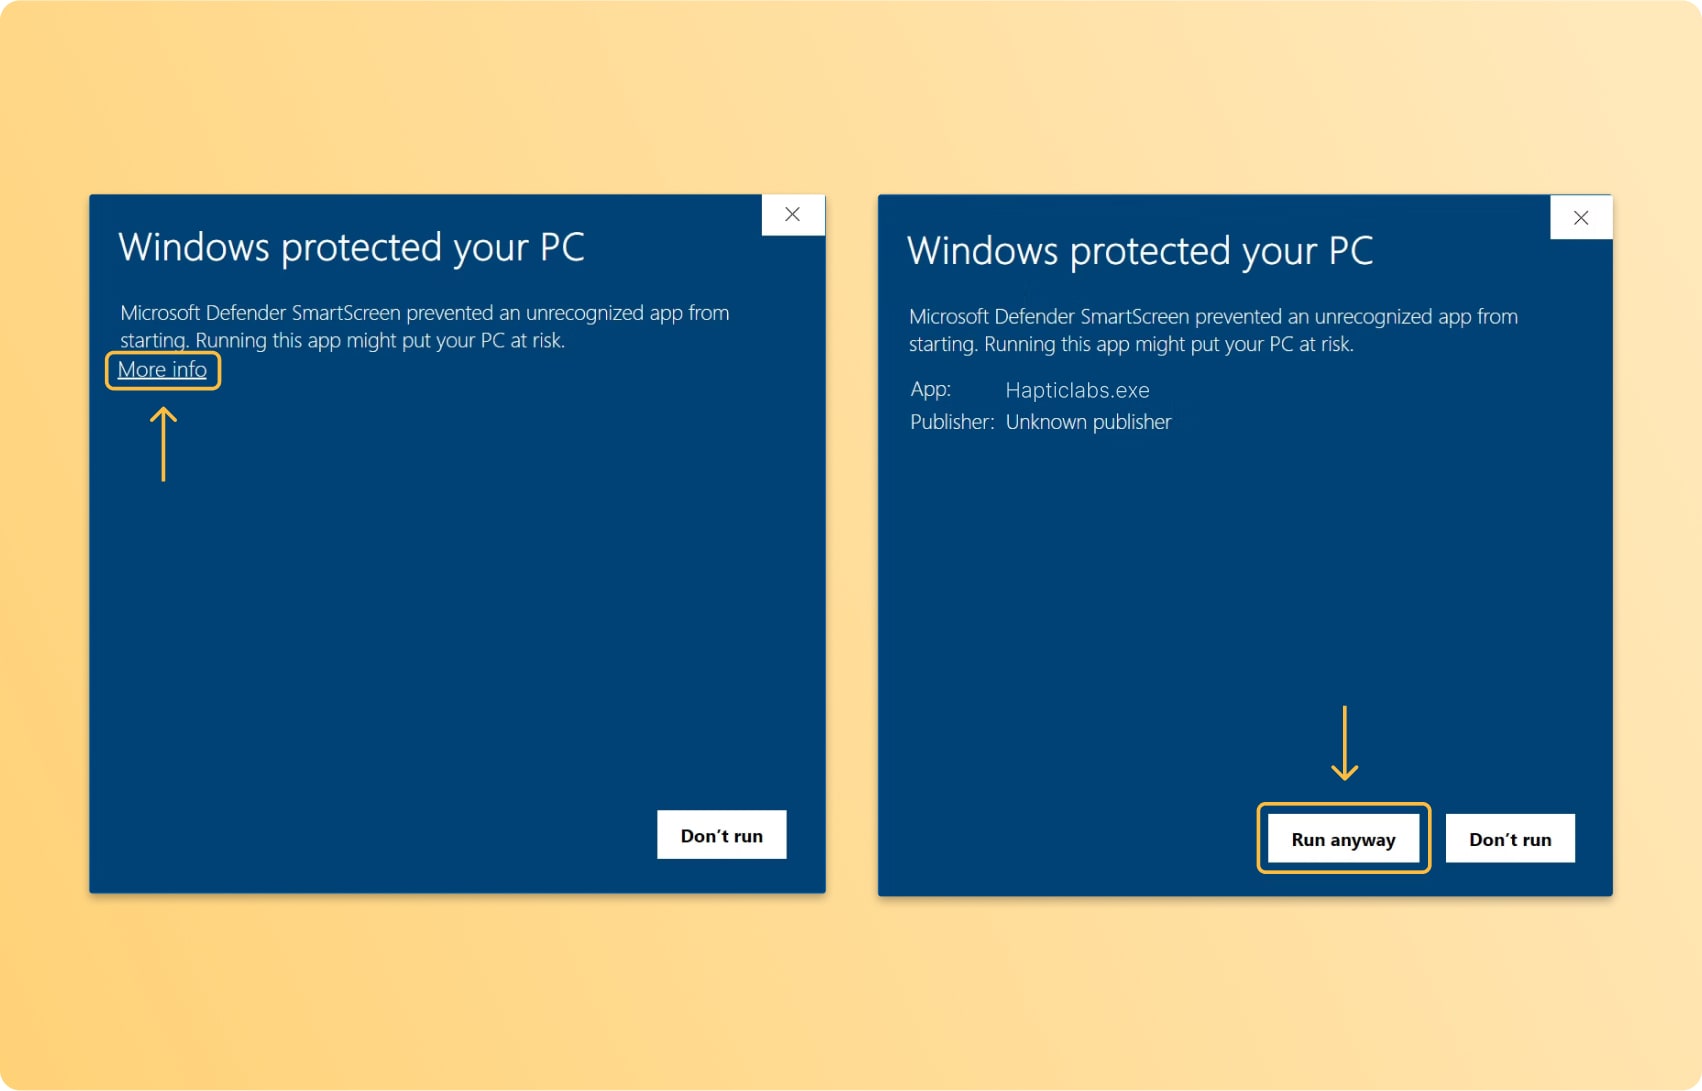
Depending on your system settings, you might receive the warning "Windows protected your PC" by Microsoft Defender.
- To bypass the Defender warning, click the More info button.
- Now, click on Run anyway and install the application as usual.
Driver installation
On Windows machines, a driver mismatch might interfere with the Satellite communication. If you have trouble connecting within Hapticlabs Studio, follow these steps:
Download the correct driver's cabinet file from this LINK. Unpack it using e.g. 7zip and remember the location you unpacked it to.
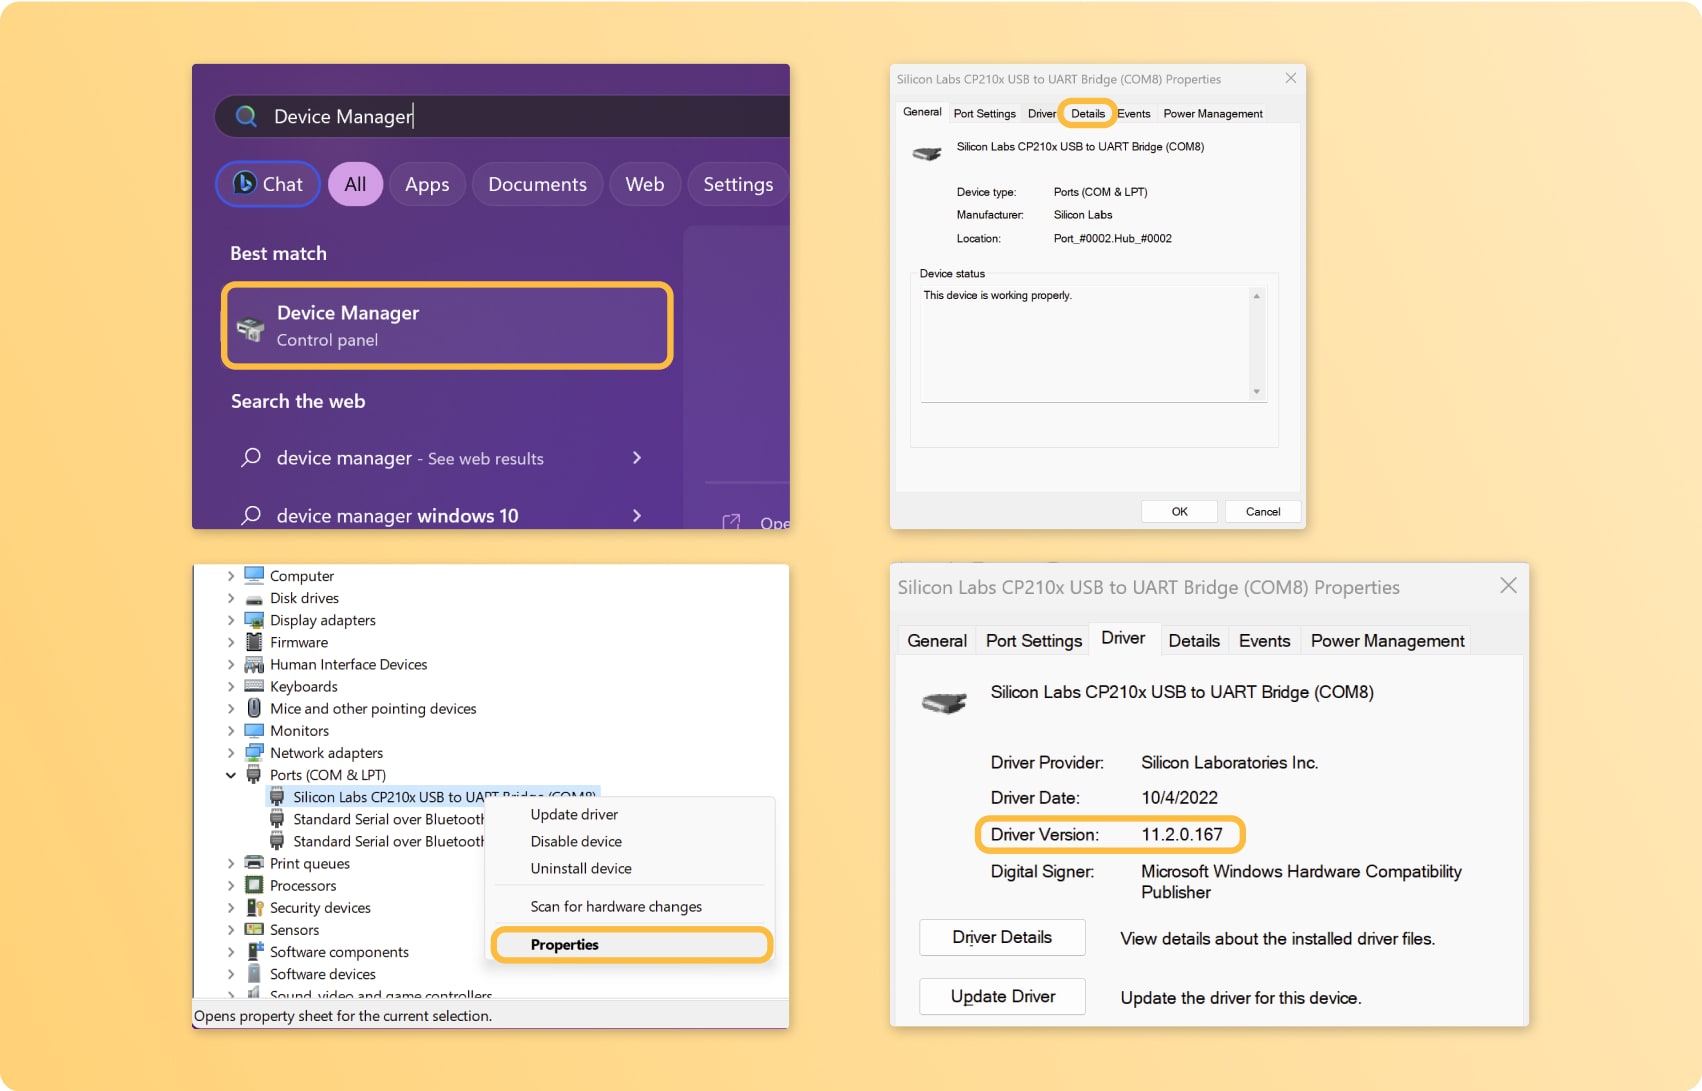
First, connect the Hapticlabs Satellite to your computer. Access the device manager using Windows' search menu. Check the driver version by locating the 'Silicon Labs CP120x USB to UART Bridge', right-clicking it and selecting 'Properties'. Next, select the 'Driver' tab in the 'Properties' window. There, you will be able to see the driver version. The correct version is: 11.1.0.53, dated to 02/18/2022.

If your driver version is different (including newer versions), uninstall the driver by right-clicking the 'Silicon Labs CP120x USB to UART Bridge' again and selecting 'Uninstall device'. In the subsequent opening window, check 'Attempt to remove driver from device' and uninstall the device.

After uninstalling your driver or if no driver is installed for the Hapticlabs Satellite, it will show up in the Device Manager in 'Other devices'. Right-click it and select 'Update driver'. In the window that opens, select 'Browse my computer for drivers'. In the window that subsequently opens, select 'Let me pick from a list of available drivers on my computer'.

In the next screen, select 'Show all devices' and press 'Next'. In the subsequent screen, select 'Have Disk...'. In the subsequent window, select 'Browse...' and navigate to the place to which you previously unpacked the driver cabinet file. Select the 'silabser.inf' file and press 'open'. Then, confirm your selection with 'OK' in the subsequent screen.
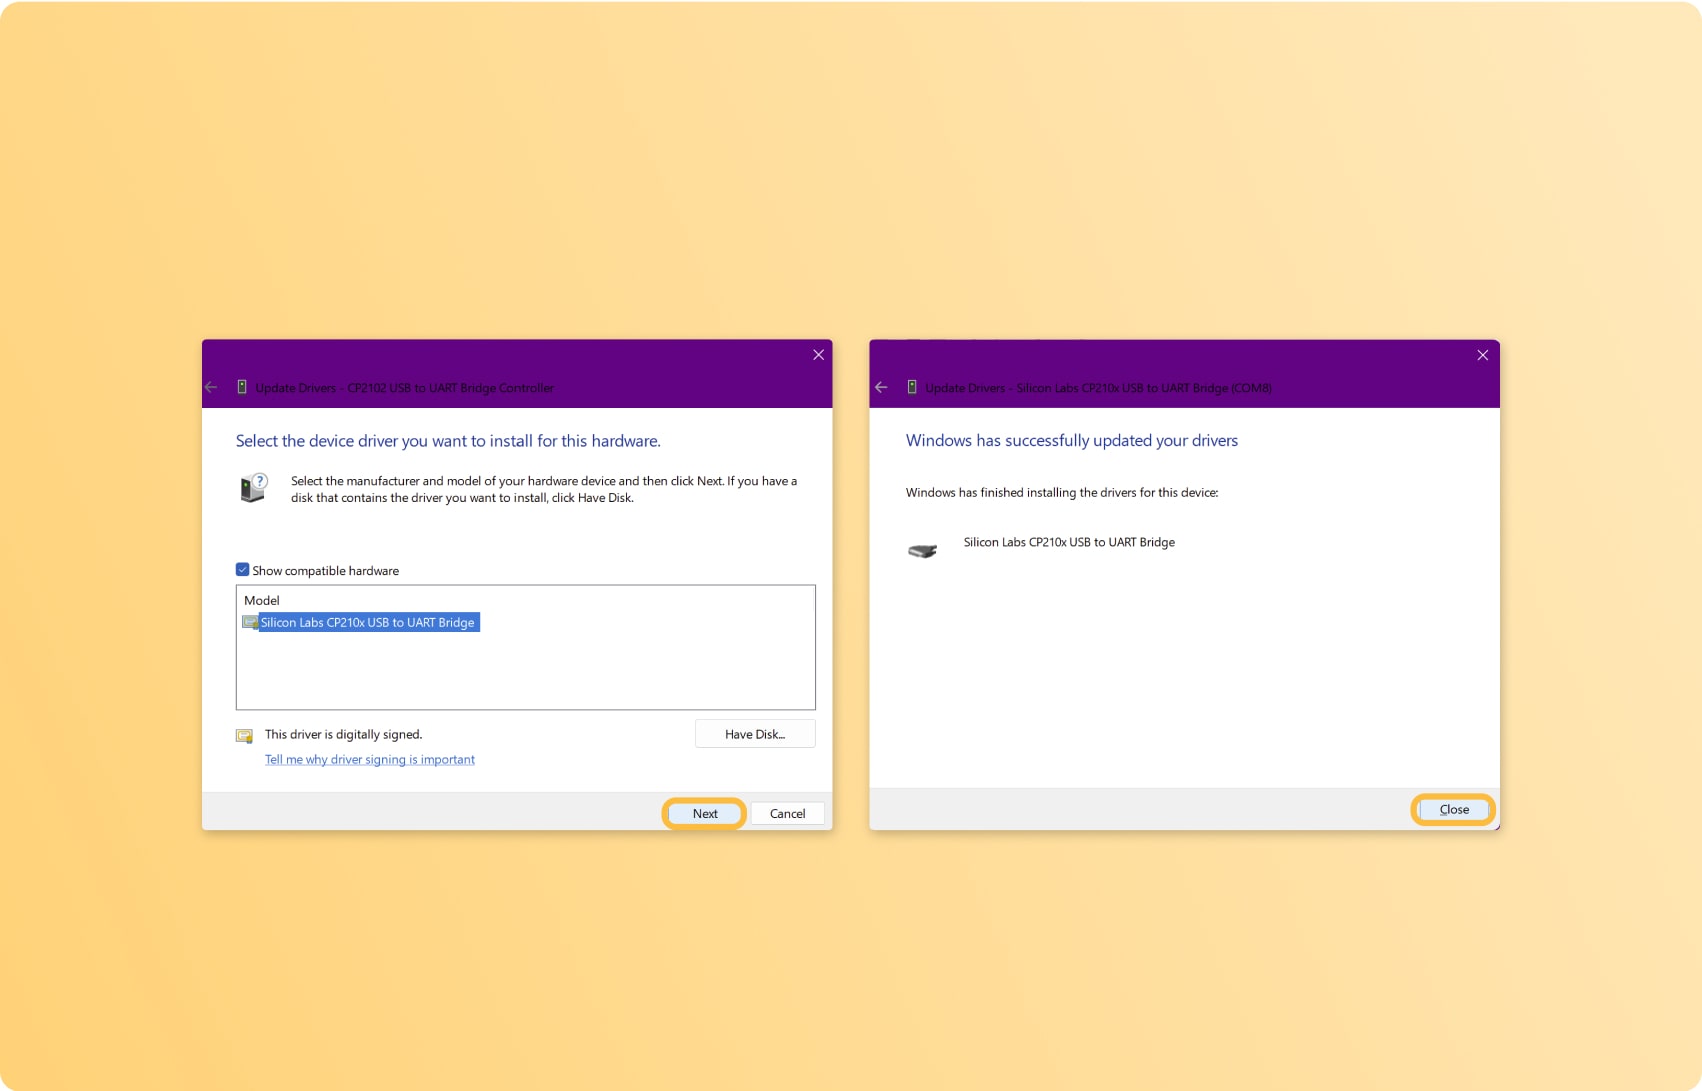
Finally, select 'Silicon Labs CP120x USB to UART Bridge' and press 'Next'. If the next screen reports 'Windows has successfully updated your drivers.', you have successfully installed the correct driver!
Download the suitable installation file through the provided link. For the packages, install them using the respective package manager. In the case of the AppImage, make sure it is executable and run it.