#
Getting started
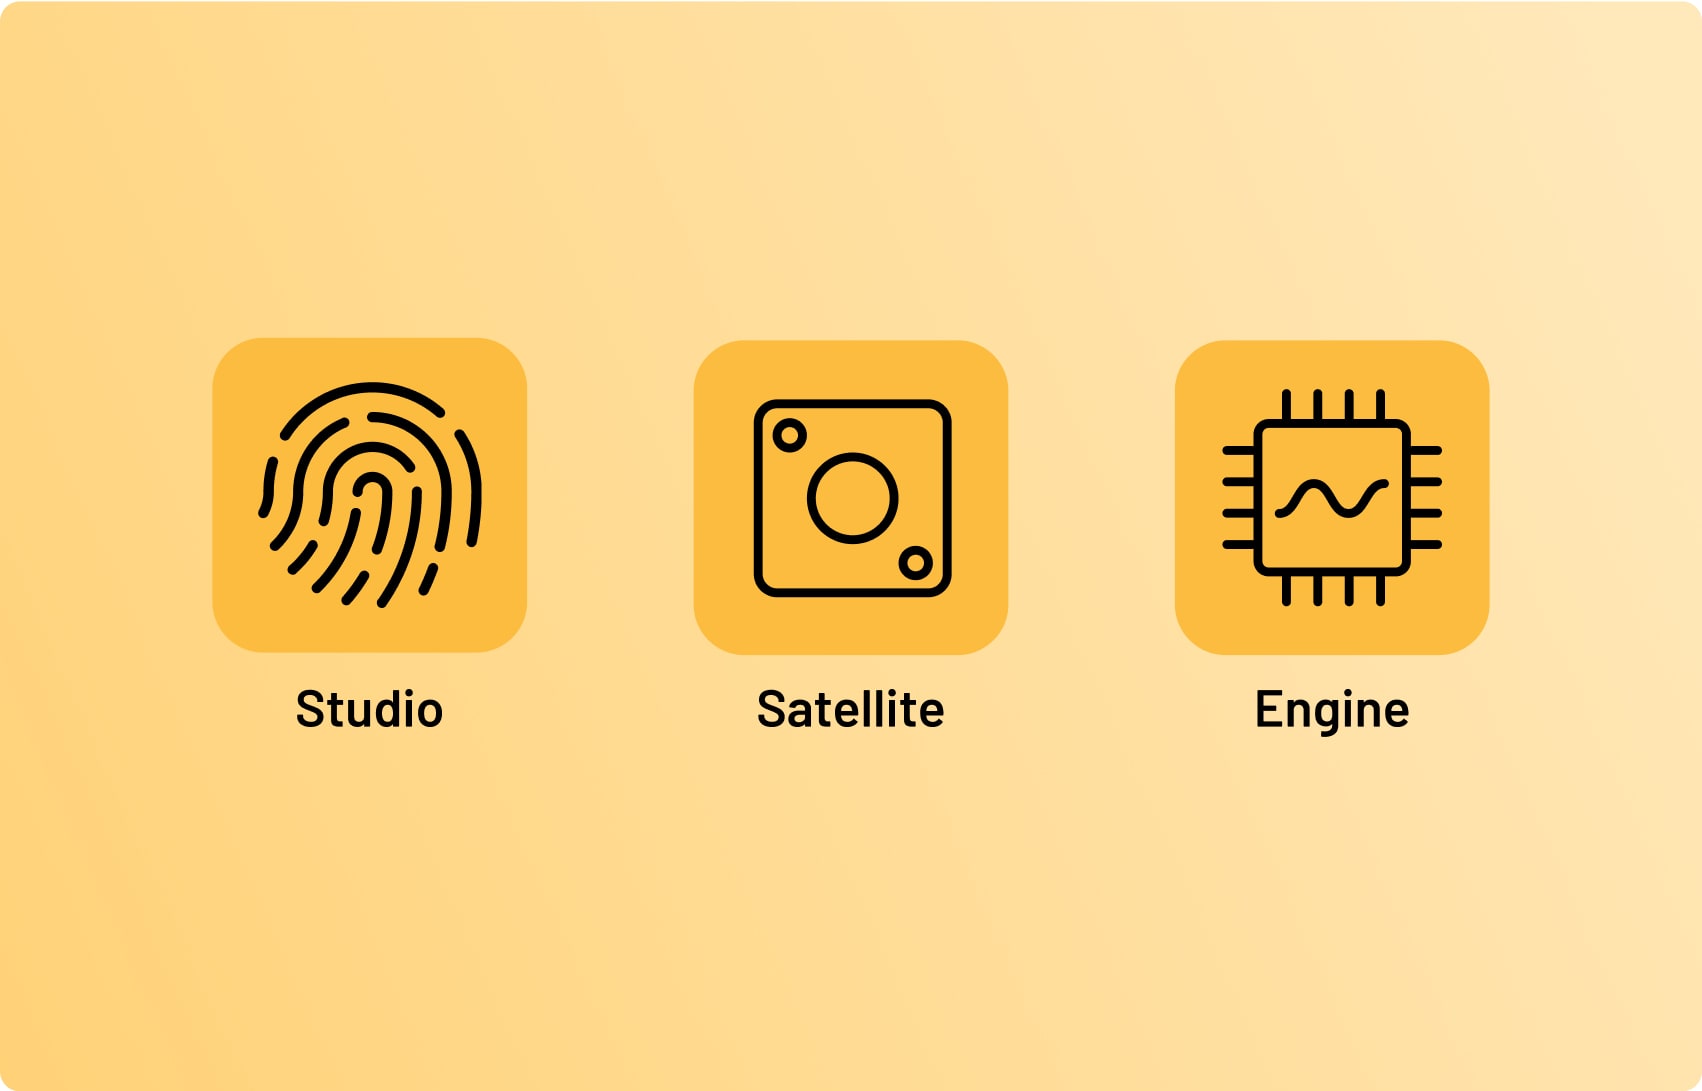
The Hapticlabs DevKit consists of:
- Hapticlabs Studio
- Desktop application to design haptic patterns
- Satellite
- Hardware module that creates the signal
- Engine
- Firmware running on the Satellite
#
Download and install
Download Hapticlabs Studio and enter the license key when prompted.
Launch Hapticlabs Studio by clicking on Hapticlabs Studio.exe (Windows), the Hapticlabs App (MacOS), or running the executable called Hapticlabs on Linux. For more info on the installation follow the link below
#
Trigger haptics
Let's start by connecting the hardware, creating a first track and playing it back:
#
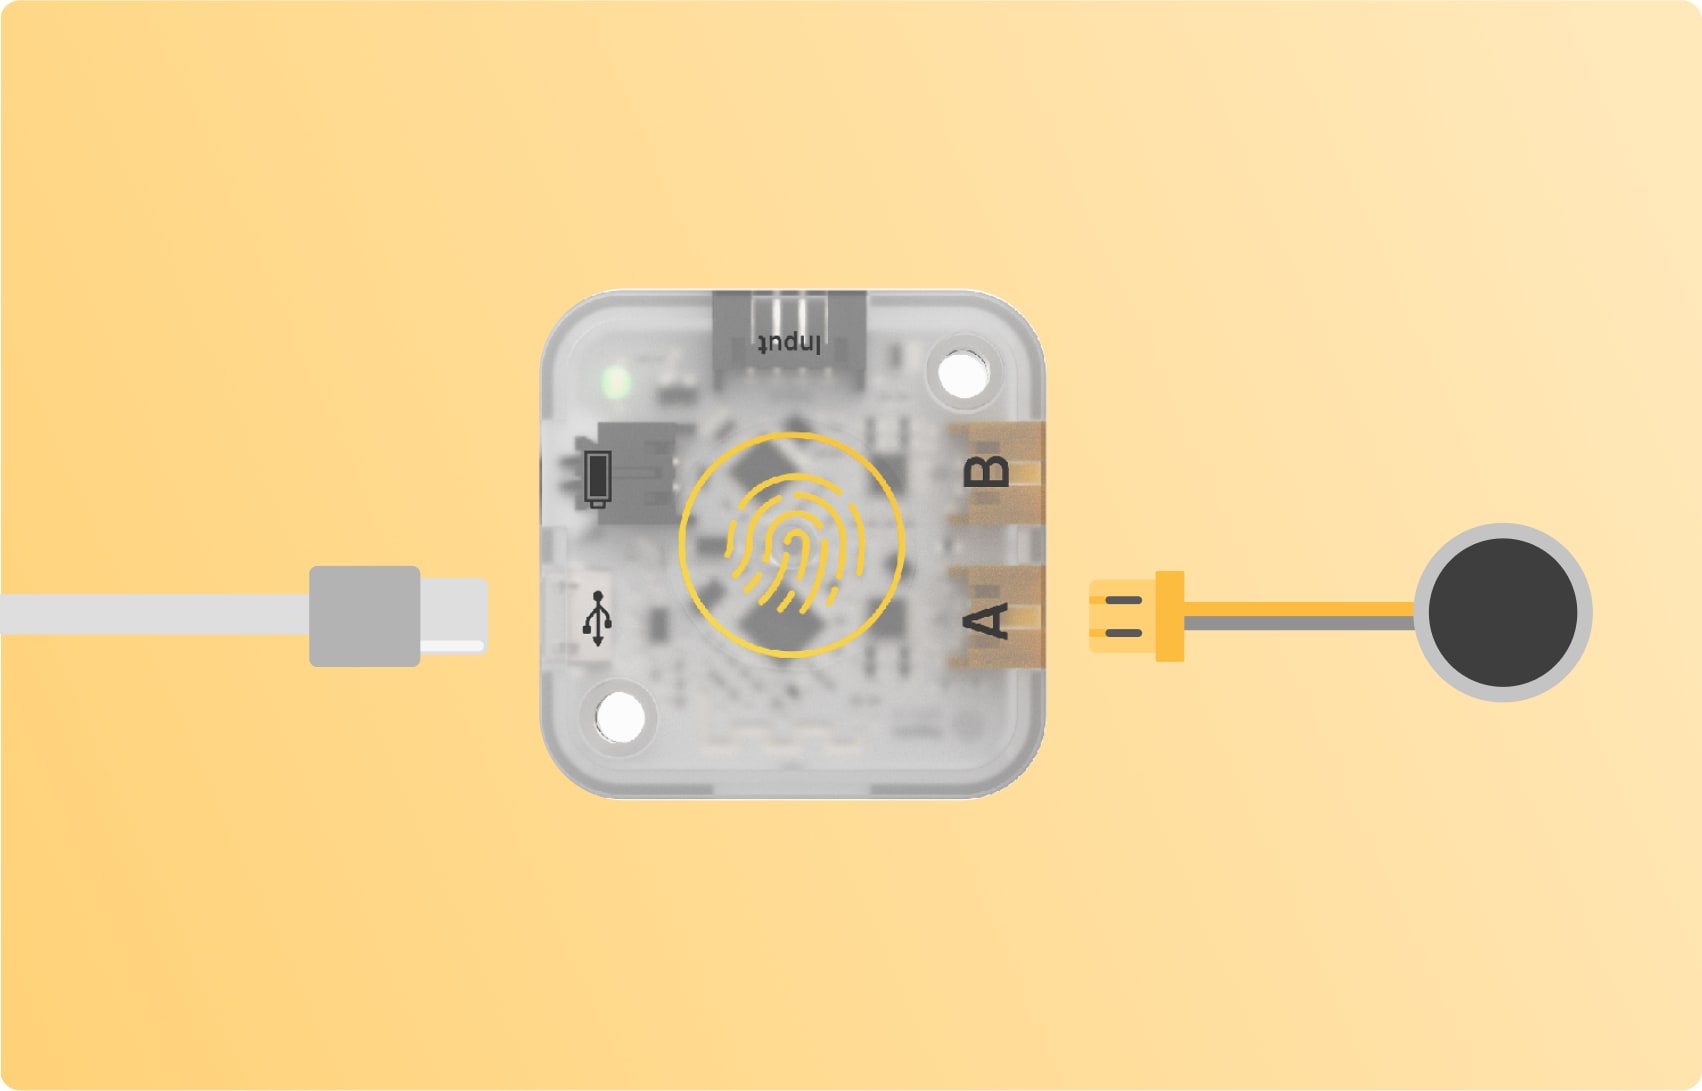
Connect the Satellite
Connect the satellite with the provided USB-C cable to your computer. Allow a few moments for the devices to recognize each other. You may need to install any required drivers or software for the satellite module to function properly on your computer. If using Windows and the satellite doesn't appear in Hapticlabs Studio, you might need to install a suitable driver
#
Connect the Actuator
Attach any of the provided actuators to the output channel labeled A or B on the Satellite Module. Read more about the supported actuator types:
#
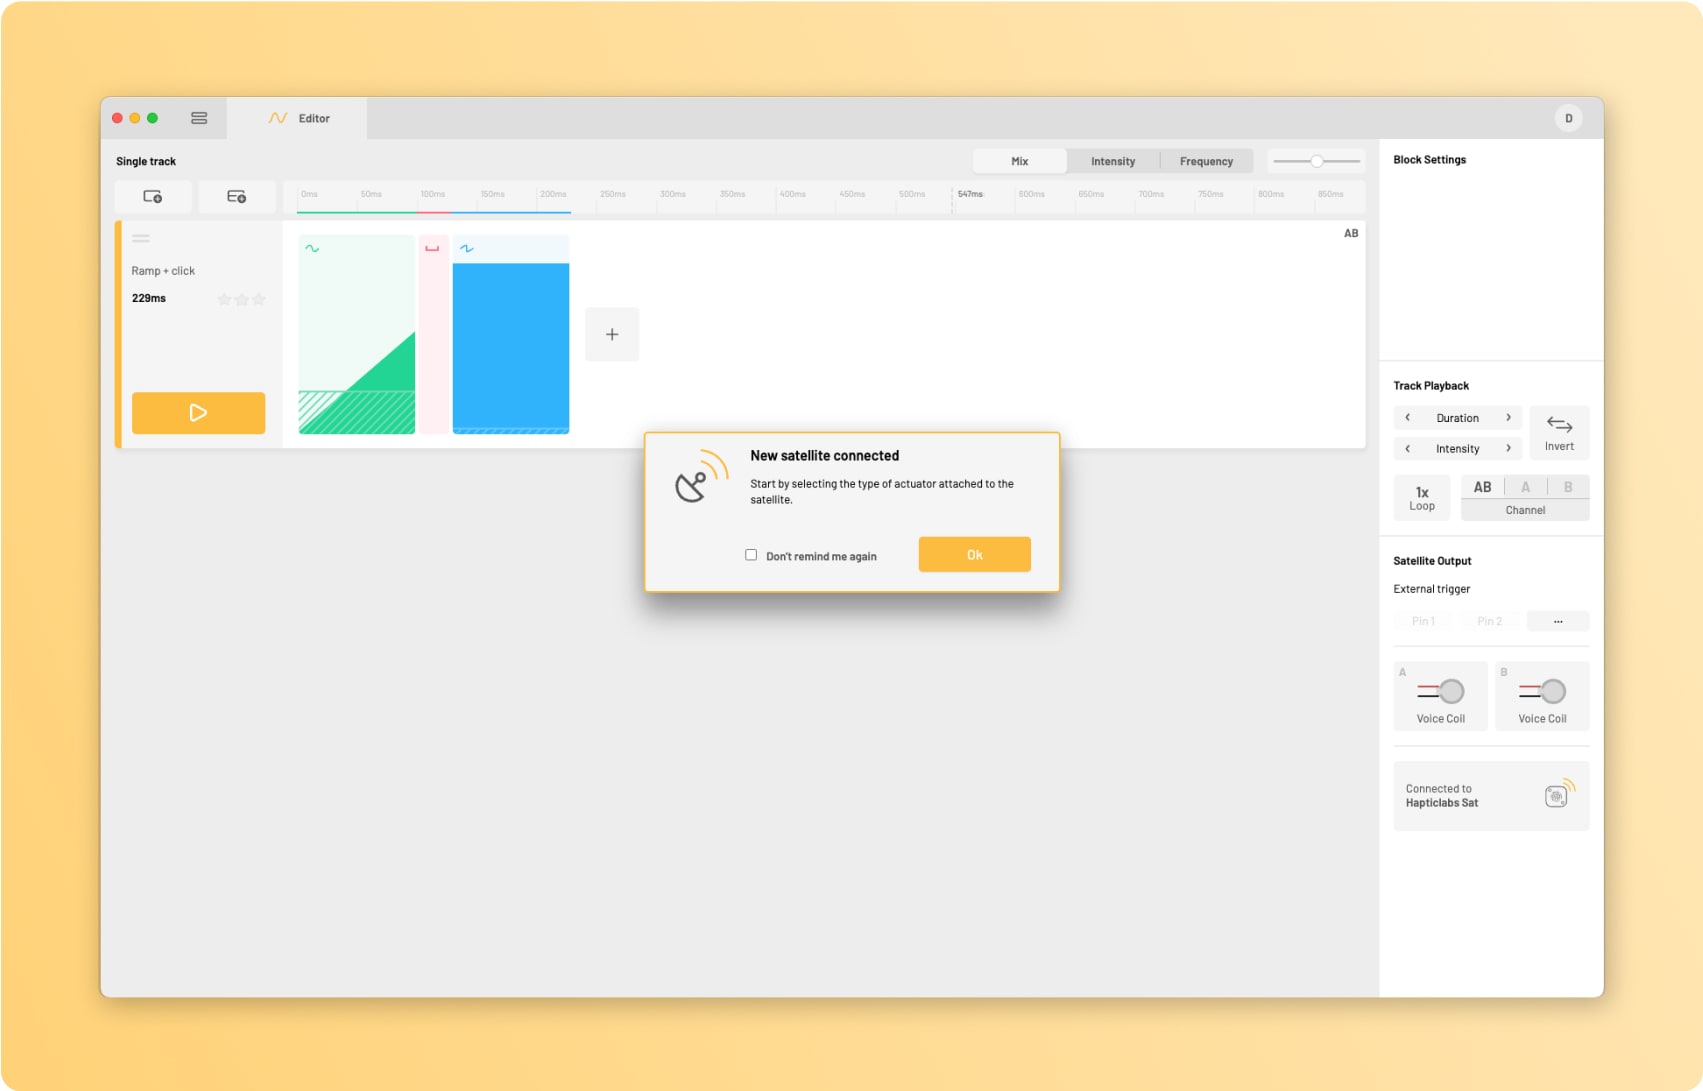
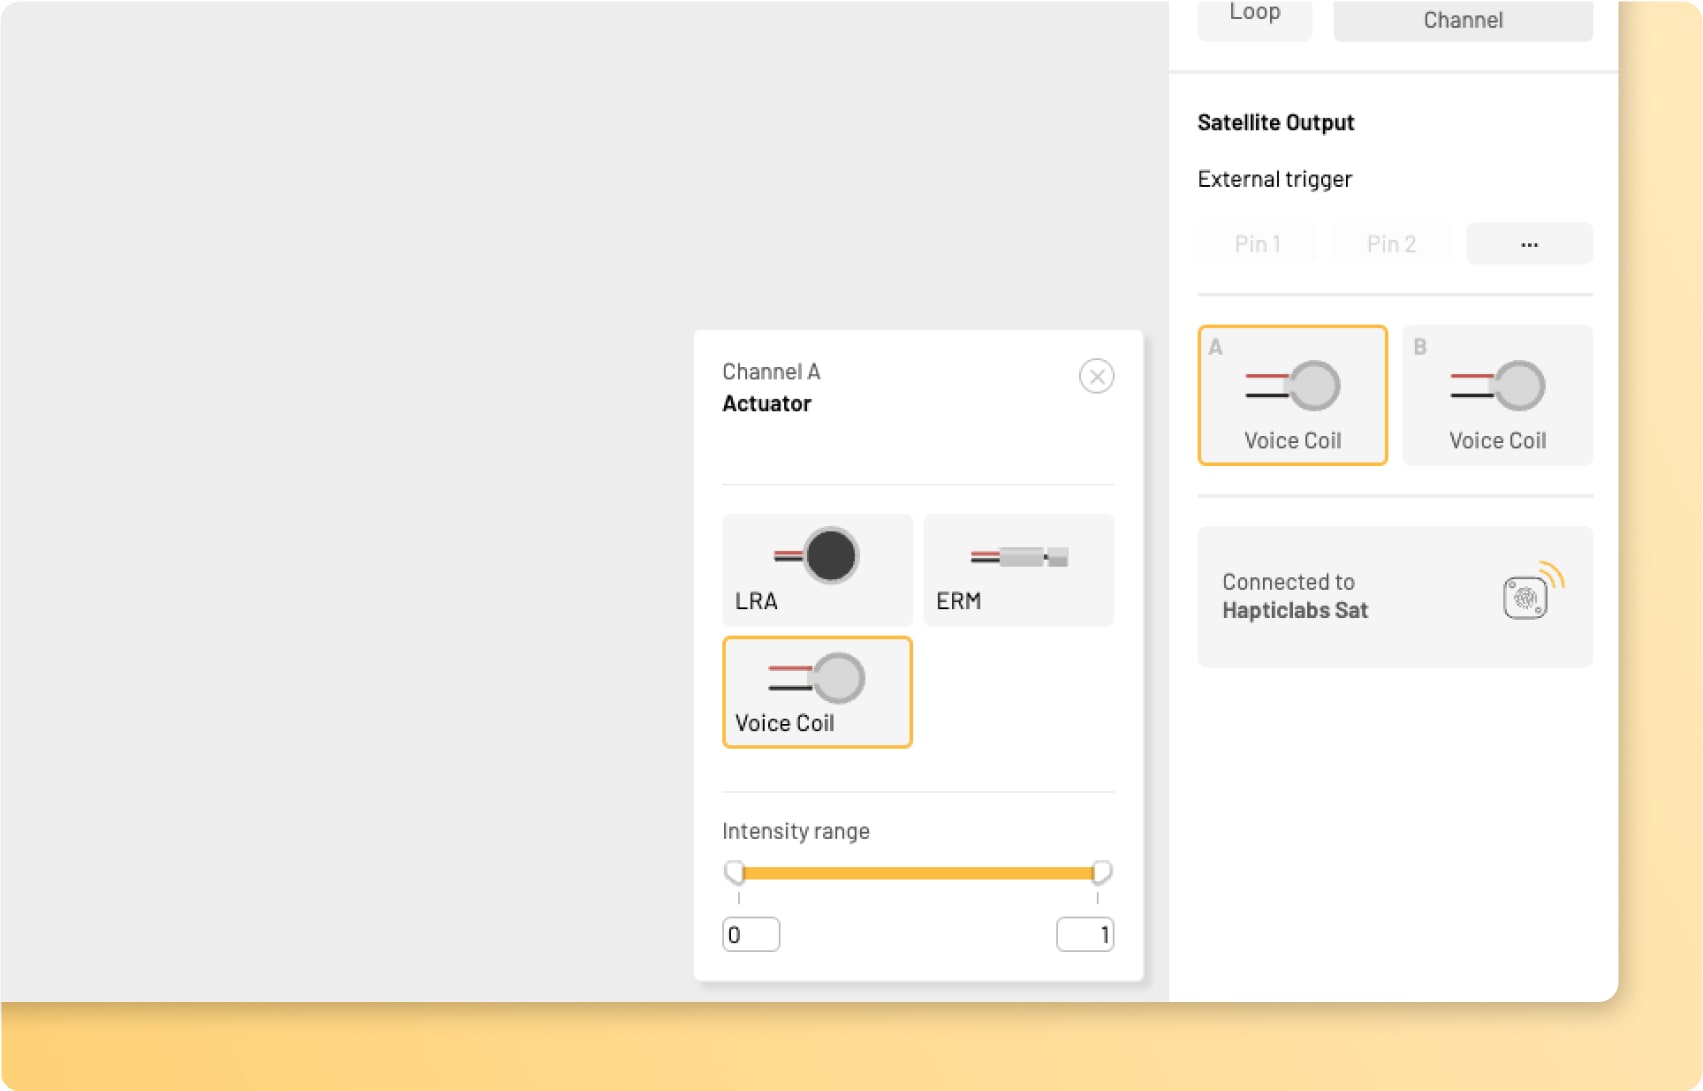
Select the actuator mode
Start your project by selecting the appropriate actuator type from the dropdown menu. Each actuator in the DevKit is labeled with the appropriate type.
Pay close attention to selecting the correct actuator mode as it will have a significant impact on the haptic signal you will feel. However don’t hesitate to try out the different types if you are unsure: You can’t do any damage to the hardware when operating in the wrong mode.
#
Add new track
Start by adding a new track, fill it with haptic blocks and arrange them to your liking
#
Adjust parameters
Adjust the block parameters by directly dragging with the cursor or adjusting the sliders
#
Hit Play
Press the play button on each track to play back the track on your actuator. Happy vibing!